Introduction to Strawberry Upside Down Cake
There’s something undeniably magical about an upside-down cake. The moment you flip it over to reveal that glistening, caramelized fruit layer is pure kitchen theater, a simple yet dramatic reveal that never fails to impress. While pineapple has long reigned supreme in the upside-down cake world, strawberries deserve their moment in the spotlight, especially during peak season when they’re at their sweetest and most aromatic.
Strawberry Upside Down Cake is a delightful blend of sweet, vibrant strawberries and soft, vanilla-infused cake. It’s a dessert with humble origins but extraordinary flavor. Upside-down cakes themselves date back to the early 1900s, when home cooks would prepare skillet cakes with seasonal fruits and a simple batter. They gained immense popularity in the 1920s when the Hawaiian Pineapple Company (now Dole) held a recipe contest featuring canned pineapples, and the pineapple upside-down cake was born.
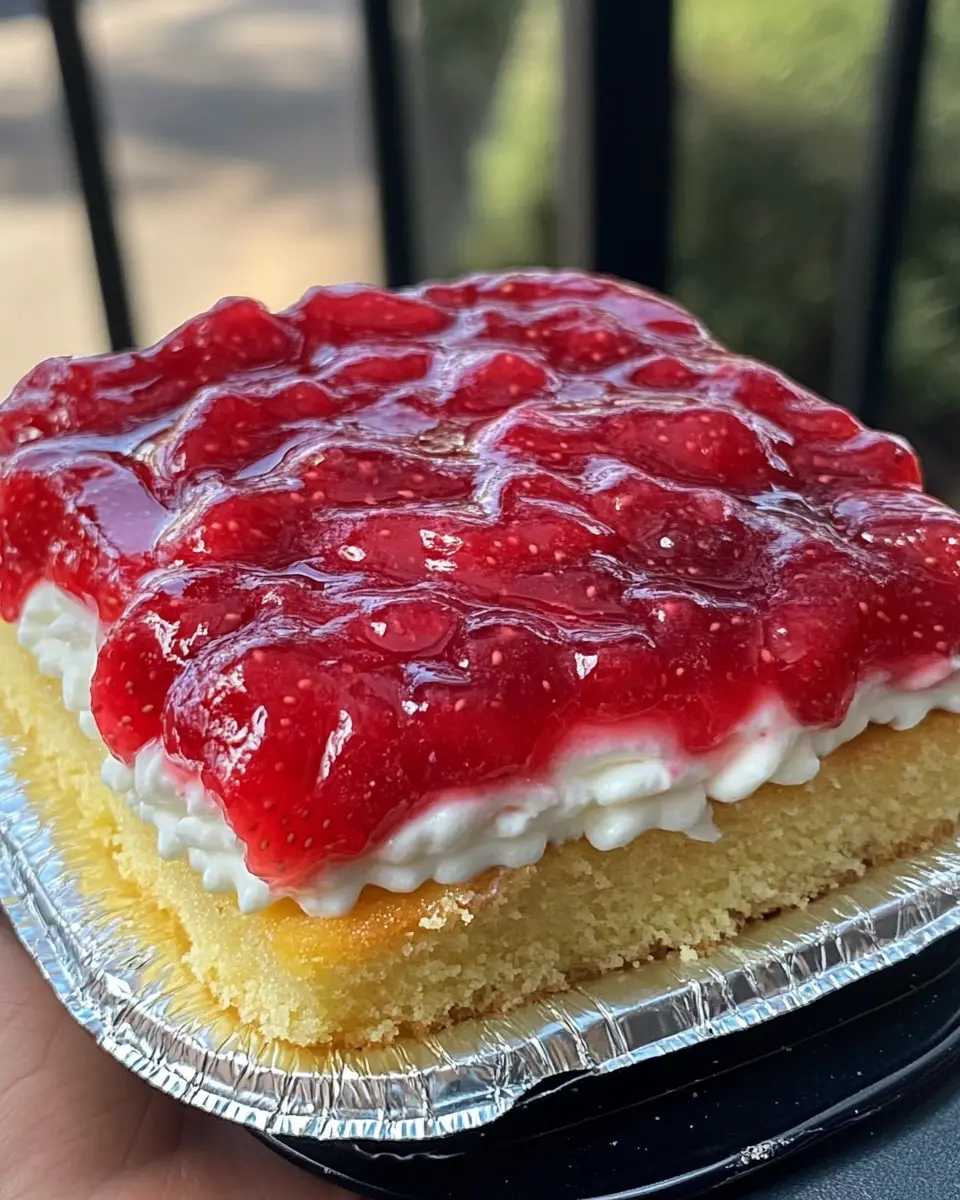
This strawberry variation, however, offers something uniquely special. Unlike its tropical cousin, Strawberry Upside Down Cake celebrates the quintessential flavor of summer—ripe, fragrant strawberries transformed by heat into something jammy and intensely flavorful. The berries release their natural juices during baking, creating a self-saucing effect that infuses the cake with beautiful color and flavor.
What makes this particular recipe stand out is the special treatment of the strawberries. Rather than simply arranging fresh strawberries in the pan, we pre-cook them with sugar and a touch of cornstarch to create a luscious, thick compote layer. This technique ensures that the strawberry topping has the perfect consistency not too runny, not too firm allowing the cake to absorb just the right amount of berry goodness without becoming soggy.
Why You’ll Love This Strawberry Upside Down Cake
If you’re still on the fence about trying this recipe, allow me to share why this Strawberry Upside Down Cake deserves a special place in your baking repertoire:
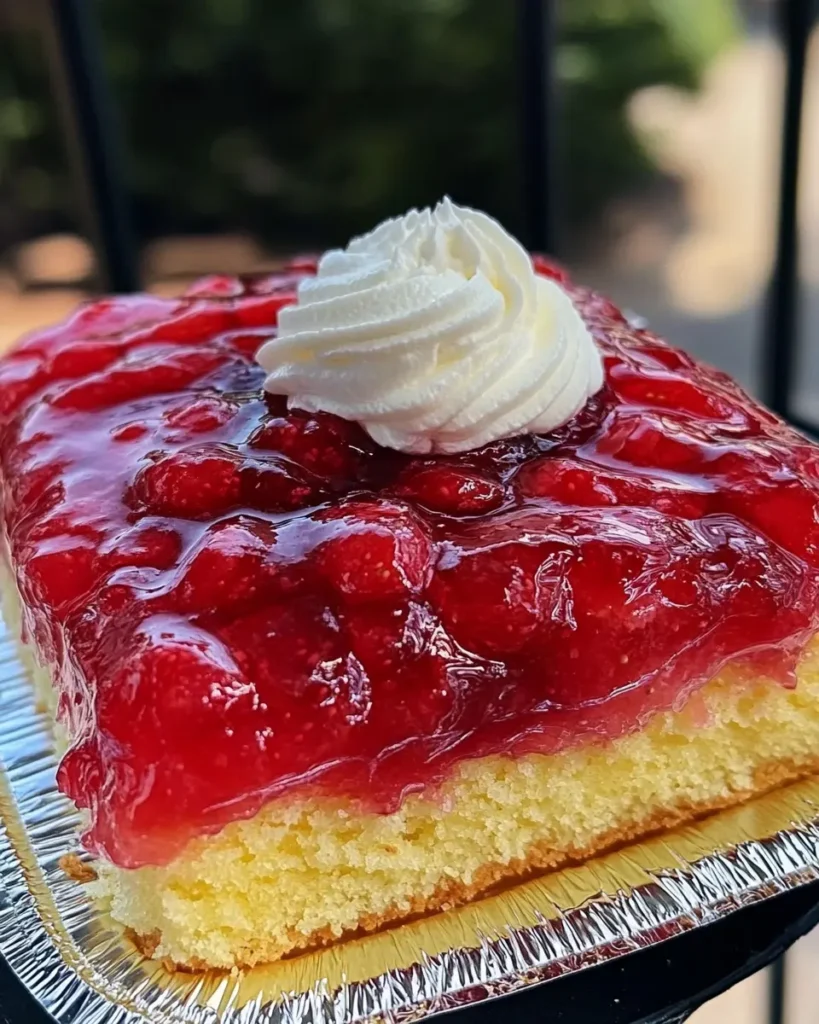
A Symphony of Flavors and Textures: Each bite of this cake is a beautiful contrast of elements—the strawberry topping offers sweet-tart jamminess, while the cake beneath provides a tender, moist crumb with vanilla notes. The edges caramelize slightly during baking, adding a subtle complexity that elevates the entire dessert. The sensation of warm cake against cool whipped cream creates a temperature contrast that makes this dessert utterly irresistible.
Surprising Simplicity: Despite its impressive appearance, this cake is remarkably straightforward to prepare. The batter comes together in minutes with basic pantry staples, and the pre-cooked strawberry layer eliminates any worry about fruit sinking or the cake becoming soggy. If you can stir ingredients together and flip a cake (with a little courage!), you can master this recipe.
Visual Wow Factor: We eat with our eyes first, and this cake delivers show-stopping beauty with minimal effort. The natural ruby-red hue of the strawberries creates a stunning jewel-toned top that needs no additional decoration. It’s the kind of dessert that elicits spontaneous “oohs” and “aahs” when brought to the table.
Year-Round Versatility: While this cake shines brightest with peak-season summer strawberries, it can be enjoyed year-round using frozen berries (just thaw and drain them first). It’s elegant enough for special occasions yet homey enough for casual family dinners. Serve it at summer barbecues, birthday celebrations, holiday gatherings, or simply as a sweet finish to a weeknight meal.
Ingredients for Strawberry Upside Down Cake
For the Strawberry Layer:
- 2 cups of sliced fresh strawberries (approximately 1 pound or 454 grams)
- 1 cup granulated sugar (200g)
- 2 tablespoons cornstarch
- Optional: ¼ teaspoon lemon zest for brightness
The Cake Batter:
- 1½ cups all-purpose flour (188g)
- 1 cup granulated sugar (200g)
- 2 teaspoons baking powder
- ½ teaspoon salt
- ½ cup unsalted butter, melted (113g)
- ½ cup milk, room temperature (120ml)
- 2 large eggs, room temperature
- 1 teaspoon vanilla extract
- Optional: ¼ teaspoon almond extract for enhanced flavor
For Serving:
- Whipped cream (highly recommended!)
- Fresh mint leaves for garnish (optional)
- Additional fresh strawberries for garnish (optional)
Ingredient Notes and Substitutions:
Strawberries: For the best flavor, use ripe, in-season berries. If you’re using frozen strawberries, make sure they are fully thawed and any extra liquid is drained before cooking. In a pinch, you could also substitute other berries or a mix of berries for a different flavor profile.
Sugar: You can reduce the sugar in the strawberry layer to ¾ cup if your berries are particularly sweet or if you prefer a less sweet dessert. Light brown sugar can be substituted for up to half of the white sugar in the strawberry layer for a deeper caramel flavor.
Flour: For a lighter texture, you can substitute cake flour for the all-purpose flour (use 1¾ cups cake flour to replace the 1½ cups all-purpose). For a heartier option, whole wheat pastry flour can replace up to half of the all-purpose flour.
Unsalted butter is recommended to better manage the salt content in the recipe. If you’re using salted butter, decrease the added salt to ¼ teaspoon. For a dairy-free option, coconut oil or a premium plant-based butter substitute can be used effectively.
Milk: Any milk variety works in this recipe, whole milk will produce the richest results, but 2%, 1%, or even plant-based alternatives like almond, oat, or coconut milk can be substituted. Each will impart a slightly different flavor and richness to the final cake.
Cornstarch: This helps thicken the strawberry layer to the perfect consistency. In a pinch, you can substitute an equal amount of arrowroot powder or 4 tablespoons of quick-cooking tapioca.
Step-by-Step Guide to Making Strawberry Upside Down Cake
Preparation (15 minutes)
- Gather and Prepare Your Ingredients: Before you begin, measure out all ingredients and have them ready at room temperature. Using eggs and milk at room temperature allows them to blend more smoothly into the batter and promotes even rising during baking. Wash, hull, and slice your strawberries to prepare them for cooking.
- Get Your Baking Pan Ready: Set your oven to preheat at 350°F (175°C). Select a 9-inch round cake pan with sides at least 2 inches high, or use a springform pan for easier release. Thoroughly coat the pan with butter, making sure to cover the corners and sides well. If using a standard cake pan (not non-stick), line the bottom with a circle of parchment paper for extra insurance against sticking.
- Set Up Your Workspace: Have a cooling rack ready for when the cake comes out of the oven, as well as a serving plate that’s slightly larger than your cake pan for the flipping process later.
Creating the Strawberry Layer (10 minutes)
- Prepare the Strawberry Mixture: In a medium-sized saucepan, mix together the sliced strawberries, 1 cup of granulated sugar, and 2 tablespoons of cornstarch. Stir well to coat the berries and dissolve the cornstarch.
- Warm the Mixture: Set the saucepan on medium heat. Cook the mixture, stirring frequently with a wooden spoon or heat-resistant spatula, until it begins to bubble and thicken, approximately 4-6 minutes. You’re looking for a consistency similar to a thick jam or compote, it should coat the back of a spoon but still be spreadable.
- Check for Doneness: To test if the mixture is thick enough, draw your finger through the mixture on the back of your spoon—it should leave a clear path that doesn’t immediately run together.
- Transfer to Baking Pan: Remove the strawberry mixture from heat and carefully pour it into your prepared cake pan, using your spatula to spread it evenly across the bottom. Set aside while you prepare the cake batter.
Making the Cake Batter (15 minutes)
- Combine Dry Ingredients: In a large mixing bowl, whisk together the flour, sugar, baking powder, and salt until well combined and free of lumps.
- Mix Wet Ingredients: In a separate medium bowl, whisk together the melted butter, milk, eggs, and vanilla extract (plus almond extract if using) until smooth and well blended.
- Mix Wet and Dry Ingredients: Add the wet ingredients to the bowl containing the dry ingredients.
Using a spatula or wooden spoon, gently fold the mixtures together until just combined. Take care not to overmix; it’s okay if there are a few small lumps. Overmixing can activate the gluten in the flour, resulting in a dense cake. - Check Consistency: The batter should be pourable but not too thin similar to a thick pancake batter. If it seems too thick, add an additional tablespoon of milk. If it seems too thin (unlikely), add a tablespoon of flour.
Assembly and Baking (40-45 minutes)
- Pour the Batter: Carefully pour the cake batter over the strawberry layer in the pan. Use a spatula to gently spread the batter to the edges of the pan, taking care not to disturb the strawberry layer beneath.
- Prepare for Oven: If using a springform pan, place it on a baking sheet to catch any potential drips from the strawberry layer.
- Bake the Cake: Place the pan in the center of your preheated oven and bake for 35-40 minutes. To check for doneness, insert a toothpick or cake tester into the center of the cake—it should come out clean or with just a few moist crumbs. The top should be golden brown and spring back when lightly touched.
- Keep an eye on the browning: If the top of the cake is darkening too fast while the center remains undercooked, loosely cover it with aluminum foil for the rest of the baking time.
The Flip and Final Touches (15 minutes plus cooling time)
- Initial Cooling: Once baked, remove the cake from the oven and place it on a wire cooling rack. Let it rest in the pan for 10-15 minutes. This allows the cake to set slightly and the strawberry topping to cool enough to hold together when flipped.
- Loosen the Edges: After the initial rest, run a thin knife or offset spatula around the edges of the cake to ensure it’s not sticking to the sides of the pan.
- The Flip: This is the moment of truth! Position your serving plate inverted on top of the cake pan. Holding the plate and pan firmly together (use oven mitts if the pan is still warm), quickly and confidently flip them over so the plate is on the bottom. Gently lift the cake pan away to reveal your upside-down cake. If you used parchment paper, carefully peel it away if it’s stuck to the strawberry topping.
- Assess and Repair: If any strawberry pieces remain stuck to the pan, simply scrape them off and place them back onto the cake, pressing gently to adhere.
- Final Cooling: Allow the cake to cool for at least 30 minutes before slicing. This gives the topping time to set and makes for cleaner slices. The cake can be served warm, at room temperature, or chilled according to your preference.
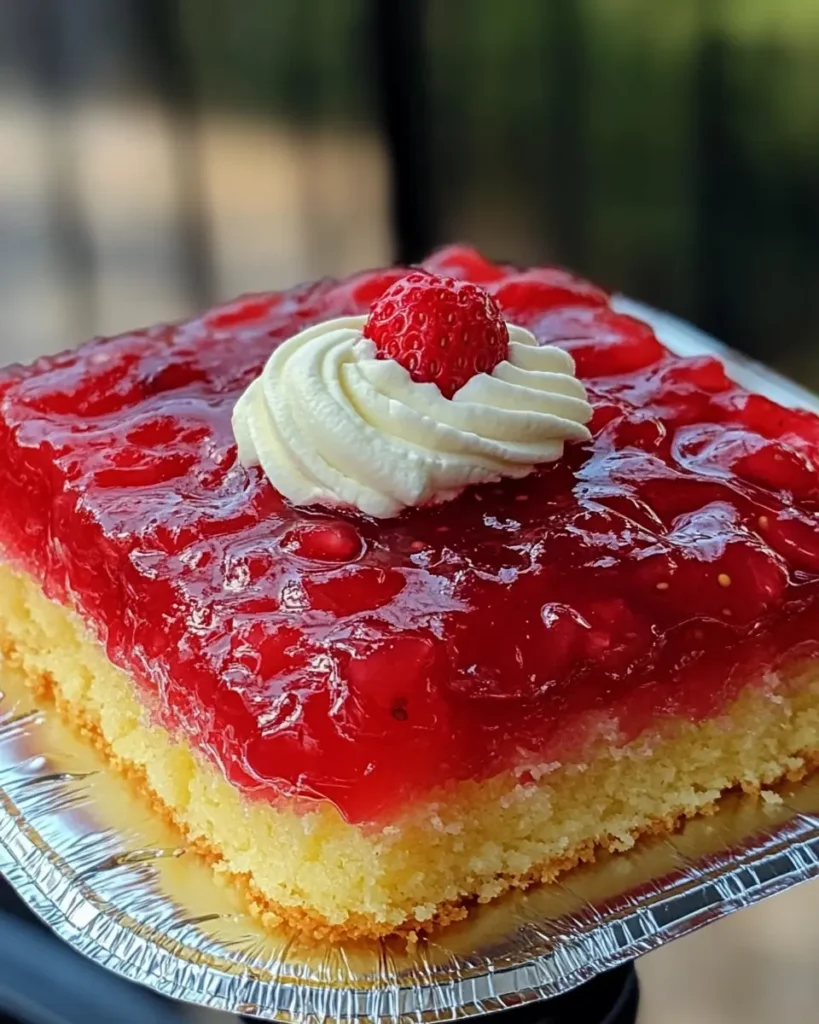
- To Serve: When you’re ready, cut the cake with a sharp knife. For neat slices, be sure to wipe the knife clean between each cut. Serve each portion with a dollop of freshly whipped cream, a few fresh strawberry slices, and a mint leaf if desired.
Tips for Success
Achieving upside-down cake perfection is within reach with these helpful hints:
Perfect Strawberry Selection: Choose ripe but firm strawberries for the best flavor and texture. Avoid overripe berries that are already soft, as they’ll break down too much during cooking. If your strawberries aren’t particularly sweet, macerate them with a tablespoon of sugar for 15 minutes before cooking to draw out their natural sweetness.
Even Strawberry Distribution: When cooking the strawberry mixture, aim for pieces of varying sizes rather than uniformly small pieces. This results in a more varied texture in the final cake. When spreading the mixture in the pan, ensure it reaches all the way to the edges for that classic upside-down cake look.
Batter Consistency: The cake batter should be thick enough to sit on top of the strawberry layer without sinking, but still pourable. If your batter seems too thick, add milk one tablespoon at a time until it reaches the right consistency.
Preventing Soggy Cake: The cornstarch in the strawberry layer is crucial, it thickens the juices and prevents them from making the cake soggy. Don’t skip this ingredient or try to reduce it.
Pan Selection Matters: A heavy-bottomed pan conducts heat more evenly and helps prevent burning. If you’re using a springform pan, wrap the outside in aluminum foil to prevent any leakage from the strawberry juices during baking.
FAQ for Strawberry Upside Down Cake
Can I make this recipe ahead of time?
Absolutely! This cake can be made up to a day in advance and stored at room temperature, loosely covered. In fact, the flavors develop beautifully as it sits for a few hours. If making further ahead, store it in the refrigerator for up to 3 days. Let it come to room temperature before serving, or gently warm individual slices in the microwave for 15-20 seconds.
My cake didn’t come out of the pan cleanly. What went wrong?
Several factors could contribute to sticking: Make sure to generously grease your pan, particularly the sides. Using parchment paper on the bottom helps tremendously. The most common mistake is not letting the cake cool for the full 10-15 minutes before flipping, the cooling time allows the topping to set just enough to hold together. If you’re having persistent issues, consider using a well-seasoned cast iron skillet or a non-stick cake pan with tall sides.
Can I substitute other fruits in this recipe?
Absolutely! This recipe works beautifully with many fruits. Try raspberries, blackberries, peaches, plums, or apricots. For firmer fruits like apples or pears, consider pre-cooking them slightly longer to soften before assembling the cake. You may need to adjust the sugar depending on the natural sweetness of your chosen fruit.
How do I make this cake dairy-free?
To make a dairy-free version, substitute the butter with an equal amount of melted coconut oil, vegan butter, or a neutral vegetable oil like canola. Replace the milk with your favorite plant-based alternative—almond, oat, or coconut milk all work well.
Can I reduce the sugar in this recipe?
Yes, with some adjustments. The sugar in the strawberry layer can be reduced to ¾ cup without significantly affecting the texture. In the cake batter, you can reduce the sugar to ¾ cup, but I wouldn’t recommend going lower as it will affect both flavor and texture. If using less sugar in the strawberry layer, you might want to reduce the cornstarch slightly (to 1½ tablespoons) as there will be less liquid to thicken.
Can I freeze this cake?
While best enjoyed fresh, you can freeze this cake for up to 2 months. Let the cake cool fully, then wrap it securely in plastic wrap and aluminum foil. To thaw, place it in the refrigerator overnight and allow it to reach room temperature before serving. Note that the texture of the strawberry topping may become slightly softer after freezing and thawing.
What if I don’t have a round cake pan?
An 8×8-inch square pan works as an alternative to the 9-inch round pan. You could also use a well-seasoned 9 or 10-inch cast iron skillet for a rustic presentation—the added bonus is that you can cook the strawberry mixture directly in the skillet before adding the batter and baking. Just be careful when flipping a heavy cast iron pan!
Conclusion
There’s something wonderfully nostalgic yet freshly exciting about this Strawberry Upside Down Cake. It honors the tradition of classic upside-down cakes while bringing the bright, juicy goodness of strawberries to center stage. The moment you flip this cake to reveal its glistening ruby topping is pure kitchen magic one of those simple pleasures that makes baking such a joy.
What I enjoy most about this recipe is how versatile it is. Make it as written for a reliable showstopper, or use it as a template for your own creative variations. For a patriotic twist, mix in a handful of blueberries with the strawberries. Stir some freshly grated ginger into the fruit for a warming zing. Swap in brown sugar for white in the topping for deeper caramel notes. The possibilities are endless, and each variation brings its own special character to the table.
Remember that baking is both science and art, follow the measurements carefully, but don’t be afraid to trust your instincts about doneness, consistency, and flavor balance. Each time you make this cake, you’ll discover something new about the process and probably develop your own special tricks.
I hope this Strawberry Upside Down Cake brings as much joy to your table as it has to mine. Whether you’re serving it at a summer celebration, a holiday gathering, or simply as a sweet ending to a family dinner, it’s sure to create moments of pure delight with every forkful. Be sure to share your results on social media or leave a comment below! I’d love to see how your cake turns out and hear about any personal touches you added to make it your own.