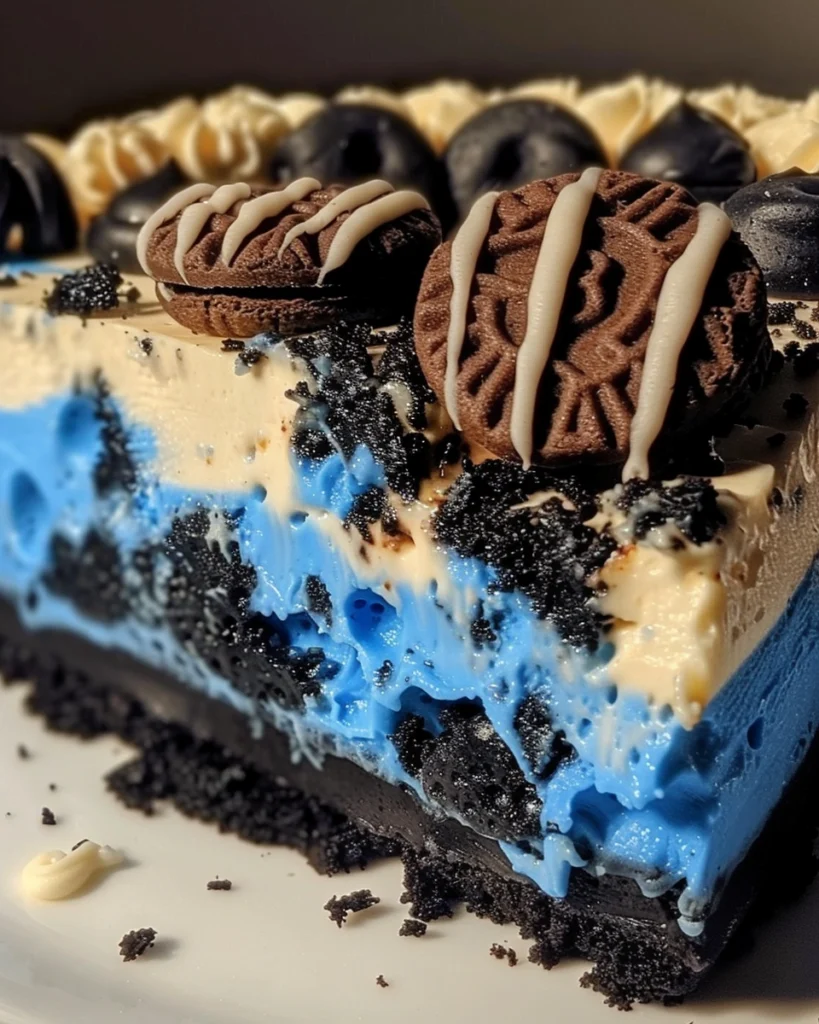
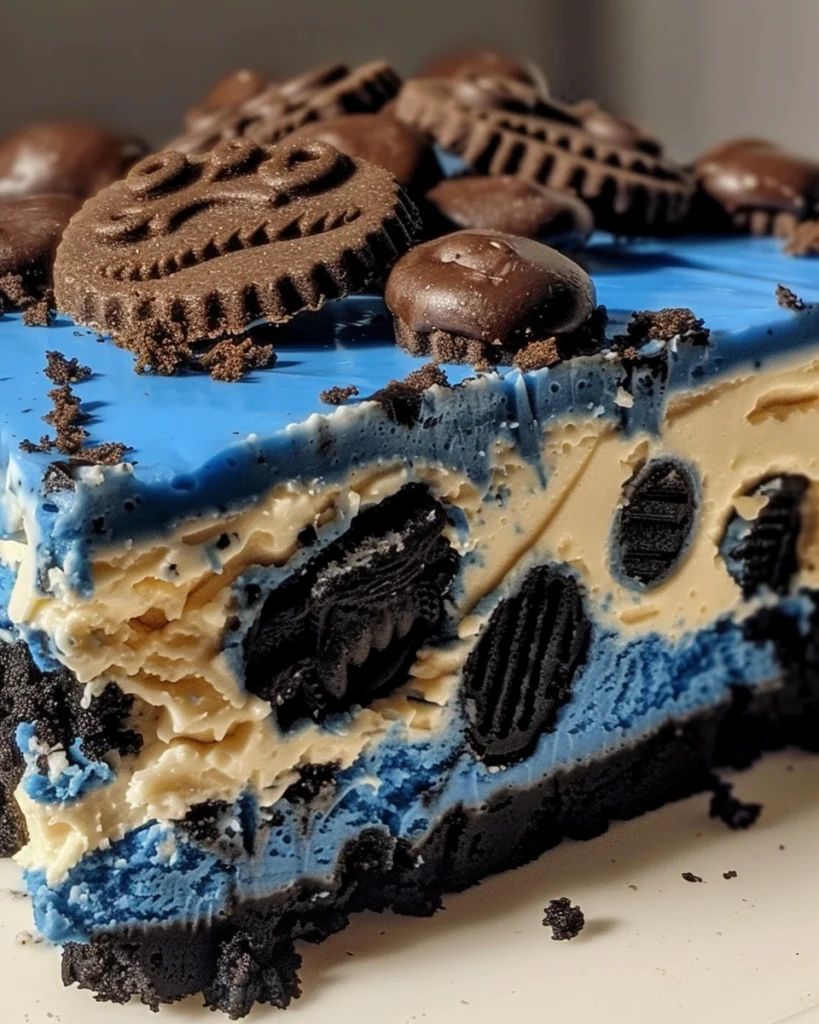
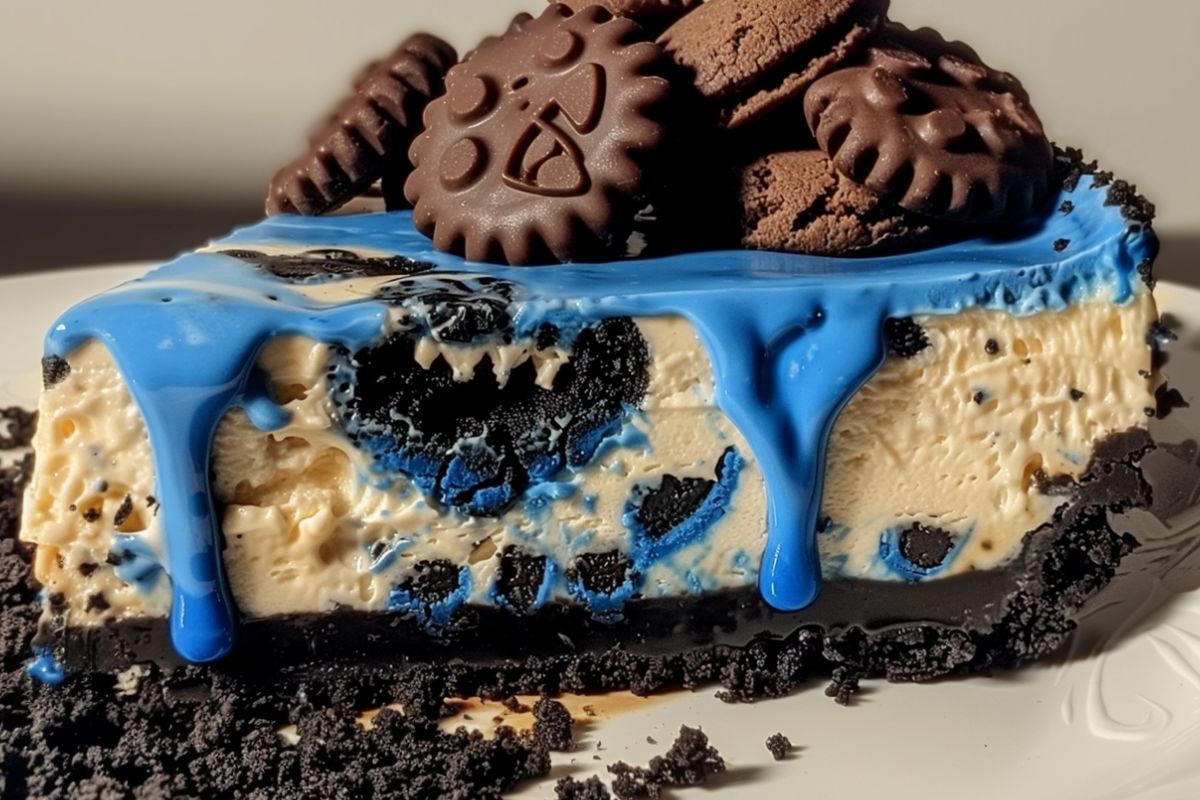
If you’re looking for a dessert that’s as fun to make as it is to eat, this Cookie Monster Cheesecake is the perfect treat! With a creamy cheesecake filling loaded with cookie chunks, a crunchy Oreo crust, and a whimsical blue Cookie Monster topping, it’s a guaranteed crowd-pleaser for parties, birthdays, or just because.
Ingredients
For the Crust:
- 1 1/2 cups Oreo cookie crumbs (about 15-18 cookies)
- 1/4 cup granulated sugar
- 1/2 cup unsalted butter, melted
The Cheesecake Filling:
- 4 (8 oz) packages cream cheese, softened
- 1 cup granulated sugar
- 1 tsp vanilla extract
- 4 large eggs
- 1 cup sour cream
- 1 cup heavy cream
- 1 cup of crushed chocolate chip cookies (approximately 10 cookies)
The Cookie Monster Topping:
- 1 cup heavy cream
- 1/4 cup powdered sugar
- 1 tsp vanilla extract
- 1 cup blue buttercream frosting (store-bought or homemade)
- Mini chocolate chip cookies for garnish

Step-by-Step Instructions
1. Prepare the Crust:
- Preheat your oven to 350°F (175°C).
- Combine Oreo cookie crumbs, granulated sugar, and melted butter in a bowl. Mix until the texture resembles wet sand.
- Firmly press the mixture into the base of a 9-inch springform pan, ensuring it forms an even layer.
- Bake for 10 minutes, then let it cool while you prepare the filling.
2. Make the Cheesecake Filling:
- In a large bowl, mix the softened cream cheese and granulated sugar together until the mixture is smooth and creamy.
- Mix in the vanilla extract and eggs, one at a time, until fully incorporated.
- Add the sour cream and heavy cream, mixing until the batter is smooth.
- Fold in the crushed chocolate chip cookies gently to distribute them evenly.
3. Assemble and Bake:
- Pour the cheesecake filling over the prepared crust, smoothing the top with a spatula.
- Place the springform pan on a baking sheet and bake for 60-70 minutes, or until the center is slightly jiggly but set.
- Turn off the oven, crack the door open slightly, and let the cheesecake cool in the oven for 1 hour.
- Remove and refrigerate for at least 4 hours, preferably overnight.
4. Prepare the Cookie Monster Topping:
- In a bowl, beat the heavy cream, powdered sugar, and vanilla extract until stiff peaks develop.
- Spread or pipe the blue buttercream frosting over the cheesecake.
- Pipe dollops of whipped cream on top and decorate with mini chocolate chip cookies for a fun Cookie Monster theme.

Helpful Tips for Perfect Cookie Monster Cheesecake
Making a Cookie Monster Cheesecake that’s both visually stunning and delicious requires a few key techniques. Follow these tips to ensure your cheesecake turns out perfectly every time:
- Room Temperature Ingredients: Always use softened cream cheese and room-temperature eggs. Cold ingredients can lead to lumps in the batter and an uneven texture in the cheesecake.
- Don’t Overmix: While it’s important to ensure the batter is smooth, overmixing can incorporate too much air, causing the cheesecake to puff up and crack as it cools. Mix just until the ingredients are combined.
- Avoid Cracks: Use a water bath while baking the cheesecake to prevent cracking. Wrap the bottom of the springform pan in foil, place it in a larger pan, and fill the larger pan with hot water. The added moisture creates a gentler baking environment.
- Gradual Cooling: Rapid temperature shifts may lead to cracks in the cheesecake. Let it cool in the oven with the door slightly ajar for an hour after baking, then transfer it to the refrigerator to chill.
- Crust Perfection: Press the crust mixture firmly into the pan to create a stable base. Using the bottom of a measuring cup can help ensure an even layer.
- Decorating Fun: Use a piping bag with a star tip for a professional look when adding the whipped cream and buttercream frosting. Mini chocolate chip cookies make a perfect garnish for the Cookie Monster theme.
- Make Ahead: Cheesecake tastes even better the next day, so prepare it ahead of time to allow the flavors to meld.
By following these tips, you’ll create a Cookie Monster Cheesecake that’s creamy, delicious, and as fun to look at as it is to eat!
Creative Variations for Cookie Monster Cheesecake
The classic Cookie Monster Cheesecake is already a fun and indulgent dessert, but there are plenty of ways to customize it to suit your preferences or occasions. Here are some exciting variations to try:
- Double Cookie Delight
Add extra cookie chunks to the filling by including crushed Oreos along with chocolate chip cookies. This creates a double dose of cookie flavor and a delightful texture in every bite. - Peanut Butter Twist
For a nutty twist, swirl creamy peanut butter into the cheesecake batter before baking. You can also use peanut butter cookies instead of chocolate chip cookies for a unique flavor combination. - Mint Cookie Monster
Add a teaspoon of mint extract to the filling and use mint chocolate chip cookies or crushed mint-flavored Oreos in the batter. Top with green frosting instead of blue for a fun, minty variation. - Rainbow Cheesecake
Divide the cheesecake batter into multiple portions and tint each with a different gel food coloring. Swirl the colors together for a rainbow effect, creating a cheerful twist on the Cookie Monster theme. - Gluten-Free Option
Replace the Oreo crust with a gluten-free cookie crust and use gluten-free chocolate chip cookies in the filling to make this cheesecake accessible to those with dietary restrictions. - Mini Cheesecakes
Turn the recipe into individual portions by baking the cheesecake batter in a muffin tin lined with cupcake wrappers. Decorate each mini cheesecake with a dollop of blue frosting and a mini cookie for a cute, single-serve dessert.
Conservation and Storage for Cookie Monster Cheesecake
Proper storage is essential to maintain the freshness and flavor of your Cookie Monster Cheesecake. Follow these tips to ensure your cheesecake remains as delightful as the day it was made:
Short-Term Storage
- Refrigeration: Once cooled and decorated, store the cheesecake in the refrigerator. Wrap it tightly in plastic wrap or store it in an airtight container to keep it from drying out or picking up other odors. It will remain fresh for up to 5 days.
- Slicing Tip: Use a sharp knife wiped clean between cuts for neat slices when serving.
Long-Term Storage
- Freezing Slices: For convenience, cut the cheesecake into individual slices. Individually wrap each slice in plastic wrap and store them in a freezer-safe container or bag. This way, you can thaw only the portions you need.
- Freezing the Whole Cheesecake: If freezing the entire cheesecake, ensure it’s completely cooled and undecorated before wrapping it tightly in plastic wrap, followed by aluminum foil. Keep it in the freezer for as long as 3 months. Add the whipped cream, blue frosting, and garnishes after thawing.
Thawing and Reheating
- Defrost frozen cheesecake in the refrigerator overnight to preserve its texture and flavor. Avoid leaving it at room temperature, as this may make it too soft.
Proper conservation ensures your Cookie Monster Cheesecake retains its creamy texture, vibrant colors, and delicious flavor, making it perfect for make-ahead preparation or enjoying leftovers later. Whether refrigerated or frozen, this dessert is a treat that keeps giving!
Serving Suggestions for Cookie Monster Cheesecake
The whimsical and delicious Cookie Monster Cheesecake deserves an equally creative presentation. Here are some serving ideas to make this dessert the star of your table:
- Classic Presentation
Serve chilled slices on dessert plates with a dollop of whipped cream or an extra drizzle of chocolate syrup. Garnish each slice with a mini chocolate chip cookie for a playful touch. - Dessert Buffet Centerpiece
Place the whole cheesecake on a cake stand at the center of your dessert table. Surround it with bowls of mini cookies, chocolate chips, or colorful sprinkles to let guests customize their own slices. - Ice Cream Pairing
Add a scoop of vanilla or cookies-and-cream ice cream to each plate for a decadent pairing. The cold creaminess of the ice cream perfectly complements the rich cheesecake. - Cookie Lover’s Plate
Serve a slice alongside an assortment of cookies, such as chocolate chip, Oreo, and sugar cookies. This cookie-themed plate is ideal for Cookie Monster fans. - Party-Ready Minis
If you’ve made mini cheesecakes, serve them on a tiered tray. Decorate each one with a swirl of whipped cream, a cookie garnish, and colorful sprinkles for a fun, bite-sized treat. - Kid-Friendly Fun
For a kid-friendly twist, add candy eyes to the blue frosting on each slice to make it resemble Cookie Monster himself. This presentation is sure to bring smiles to young guests. - Elegant Touch
For more formal occasions, pair slices with a drizzle of caramel or chocolate sauce and a sprinkle of crushed cookies for a polished look.
Whether you’re serving it at a casual gathering or a formal event, these suggestions will elevate your Cookie Monster Cheesecake, making it a memorable dessert everyone will enjoy.
Frequently Asked Questions About Cookie Monster Cheesecake
Q: Can I make this cheesecake ahead of time?
A: Yes! Cheesecake is an excellent make-ahead dessert. Prepare and bake the cheesecake up to two days in advance. Store it in the refrigerator, tightly covered, and add the blue frosting and toppings just before serving.
Q: Can I use a store-bought crust instead of making one?
A: Absolutely! If you’re short on time, you can use a pre-made Oreo or chocolate cookie crust. Just ensure it’s large enough to accommodate the cheesecake filling.
Q: What’s the best way to prevent cracks in the cheesecake?
A: Prevent cracking by baking the cheesecake in a water bath or placing a pan of hot water on the lower rack of the oven. Cooling it slowly in the oven with the door slightly open also helps.
Q: Can I freeze the cheesecake?
A: Yes, the cheesecake can be frozen. Wrap it tightly in plastic wrap and aluminum foil, and store it for up to 3 months. Thaw in the refrigerator overnight before decorating and serving.
Q: What if I don’t have blue buttercream frosting?
A: You can make a quick substitute by tinting whipped cream or cream cheese frosting with blue gel food coloring. It may not have the same texture as buttercream but will still look great.
Q: Can I use different cookies in the filling?
A: Definitely! Try adding crushed Oreos, peanut butter cookies, or even homemade cookies for a unique flavor twist.
Q: How can I tell if the cheesecake is fully baked?
A: The cheesecake is done when the edges are set, and the center jiggles slightly when the pan is gently shaken. It will firm up as it cools.
Conclusion
The Cookie Monster Cheesecake is more than just a dessert—it’s an experience that combines playful nostalgia with indulgent flavors. With its creamy cheesecake filling packed with cookie chunks, a rich Oreo crust, and a whimsical blue topping, this dessert is guaranteed to bring smiles to everyone at the table.
Perfect for kids’ parties, birthdays, or any gathering that calls for a fun and creative treat, this cheesecake is as visually appealing as it is delicious. Its versatility makes it even more special; whether you stick to the classic recipe or try one of the many variations, you’ll find endless ways to customize it for different occasions and tastes.
Beyond its delightful flavor, the Cookie Monster Cheesecake is straightforward to make, even for beginner bakers. With simple tips to prevent cracking, achieve a smooth filling, and decorate like a pro, anyone can create a dessert that looks and tastes bakery-worthy.
Plus, the ability to make it ahead of time and freeze leftovers ensures it’s convenient for busy schedules while staying fresh for days. Each slice is a perfect balance of creamy, crunchy, and sweet, delivering a dessert experience that’s truly unforgettable.
So, tie on your apron, gather your ingredients, and get ready to bake up a dessert that’s as fun to make as it is to eat. The Cookie Monster Cheesecake is sure to become a favorite in your recipe collection and a go-to treat for any celebration!
For additional inspiration and a unique variation of this playful dessert, explore this Cookie Monster Cheesecake recipe from The Flavor Bender. It offers a creative and indulgent take, ideal for anyone who loves cheesecake with a fun twist!
Print
Cookie Monster Cheesecake Recipe – Fun and Delicious Dessert
- Total Time: 6 hours 40 minutes (including cooling and chilling)
- Yield: 12 servings 1x
- Diet: Vegetarian
Description
If you’re looking for a dessert that’s as fun to make as it is to eat, this Cookie Monster Cheesecake is the perfect treat! With a creamy cheesecake filling loaded with cookie chunks, a crunchy Oreo crust, and a whimsical blue Cookie Monster topping, it’s a guaranteed crowd-pleaser for parties, birthdays, or just because.
Ingredients
For the Crust:
-
- 1 1/2 cups Oreo cookie crumbs (about 15–18 cookies)
-
- 1/4 cup granulated sugar
-
- 1/2 cup unsalted butter, melted
For the Cheesecake Filling:
-
- 4 (8 oz) packages cream cheese, softened
-
- 1 cup granulated sugar
-
- 1 tsp vanilla extract
-
- 4 large eggs
-
- 1 cup sour cream
-
- 1 cup heavy cream
-
- 1 cup of crushed chocolate chip cookies (approximately 10 cookies)
For the Cookie Monster Topping:
-
- 1 cup heavy cream
-
- 1/4 cup powdered sugar
-
- 1 tsp vanilla extract
-
- 1 cup blue buttercream frosting (store-bought or homemade)
-
- Mini chocolate chip cookies for garnish
Instructions
1. Prepare the Crust:
- Preheat your oven to 350°F (175°C).
- Combine Oreo cookie crumbs, granulated sugar, and melted butter in a bowl. Mix until the texture resembles wet sand.
- Firmly press the mixture into the base of a 9-inch springform pan, ensuring it forms an even layer.
- Bake for 10 minutes, then let it cool while you prepare the filling.
2. Make the Cheesecake Filling:
- In a large bowl, mix the softened cream cheese and granulated sugar together until the mixture is smooth and creamy.
- Mix in the vanilla extract and eggs, one at a time, until fully incorporated.
- Add the sour cream and heavy cream, mixing until the batter is smooth.
- Fold in the crushed chocolate chip cookies gently to distribute them evenly.
3. Assemble and Bake:
- Pour the cheesecake filling over the prepared crust, smoothing the top with a spatula.
- Place the springform pan on a baking sheet and bake for 60-70 minutes, or until the center is slightly jiggly but set.
- Turn off the oven, crack the door open slightly, and let the cheesecake cool in the oven for 1 hour.
- Remove and refrigerate for at least 4 hours, preferably overnight.
4. Prepare the Cookie Monster Topping:
- In a bowl, beat the heavy cream, powdered sugar, and vanilla extract until stiff peaks develop.
- Spread or pipe the blue buttercream frosting over the cheesecake.
- Pipe dollops of whipped cream on top and decorate with mini chocolate chip cookies for a fun Cookie Monster theme.
Notes
- Room Temperature Ingredients: Using room-temperature cream cheese, eggs, and heavy cream ensures a smooth and creamy cheesecake batter.
- Water Bath Optional: While a water bath helps prevent cracks, placing a pan of water on a lower rack in the oven can also add moisture and achieve similar results.
- Decorate Before Serving: Add the blue buttercream frosting and cookie garnishes just before serving to keep them fresh and visually appealing.
- Prep Time: 30 minutes
- Cook Time: 1 hour 10 minutes
- Category: Dessert
- Method: Baking
- Cuisine: American
Nutrition
- Serving Size: 1 slice
- Calories: 510
- Sugar: 28g
- Sodium: 380mg
- Fat: 37g
- Saturated Fat: 22g
- Unsaturated Fat: 12g
- Trans Fat: 0g
- Carbohydrates: 38g
- Fiber: 1g
- Protein: 8g
- Cholesterol: 150mg
Keywords: Cookie Monster Cheesecake, Fun Cheesecake Recipe, Cookie Cheesecake, Blue Frosting Cheesecake

