
Introduction to Cheesecake-Filled Chocolate Chip Cookies
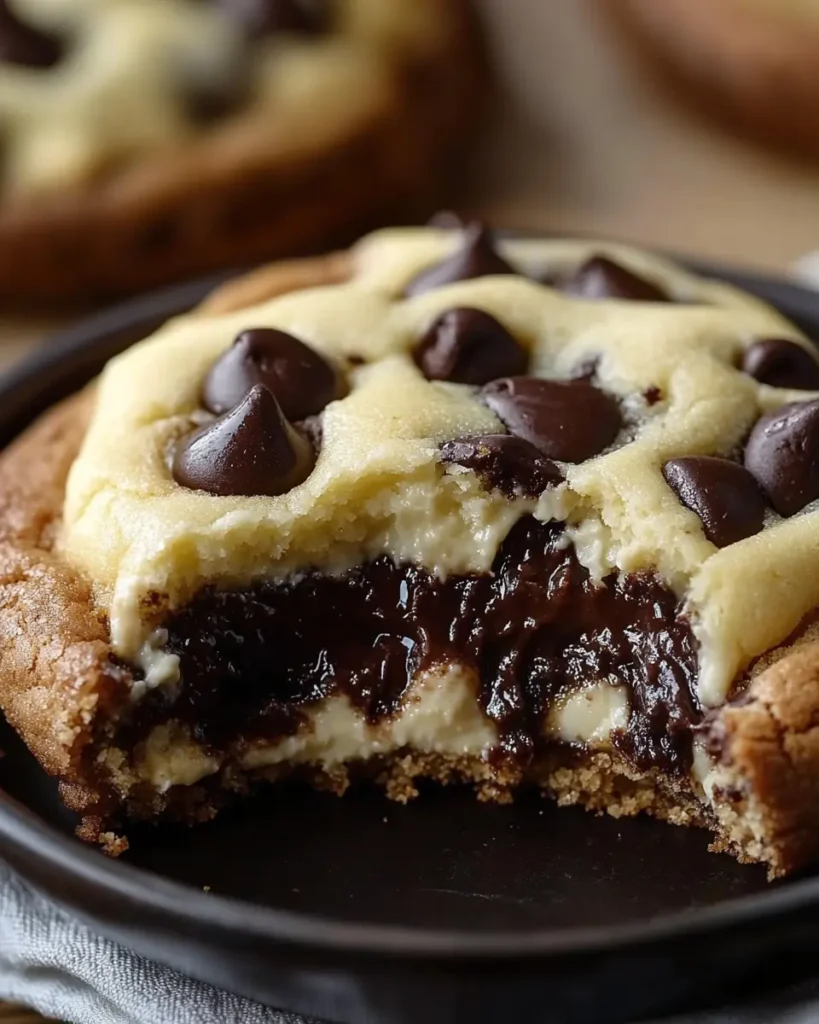
Picture this: you’re biting into what appears to be a perfectly golden chocolate chip cookie, only to discover a surprise creamy, tangy cheesecake center that melts on your tongue. This isn’t just a cookie – it’s a dessert revolution that combines two of America’s most beloved treats into one extraordinary bite.
The marriage of chocolate chip cookies and cheesecake might seem like a modern innovation, but it represents the beautiful evolution of American baking traditions. Chocolate chip cookies, invented by Ruth Graves Wakefield in 1938 at the Toll House Inn, have been a staple of American households for nearly a century. Cheesecake, with its rich history dating back to ancient Greece, found its American identity in New York-style preparations that became iconic in the mid-20th century.
What makes this particular recipe stand out is its genius simplicity combined with sophisticated flavor complexity. Rather than attempting to layer these flavors in a traditional cake format, this recipe encases smooth, vanilla-scented cheesecake filling within tender cookie dough, creating individual portions of pure indulgence. Each cookie becomes a personal celebration, perfect for special occasions or when you simply want to elevate your everyday baking game.
The cultural significance of this hybrid dessert speaks to our modern desire for innovation while honoring tradition. It represents the kind of creative baking that has made food blogs and social media platforms buzz with excitement, yet it’s accessible enough for home bakers of all skill levels to master. This creative fusion has gained popularity among baking enthusiasts, with variations appearing across food blogs like Sugar Spun Run.
Why You’ll Love This Cheesecake-Filled Chocolate Chip Cookie Recipe
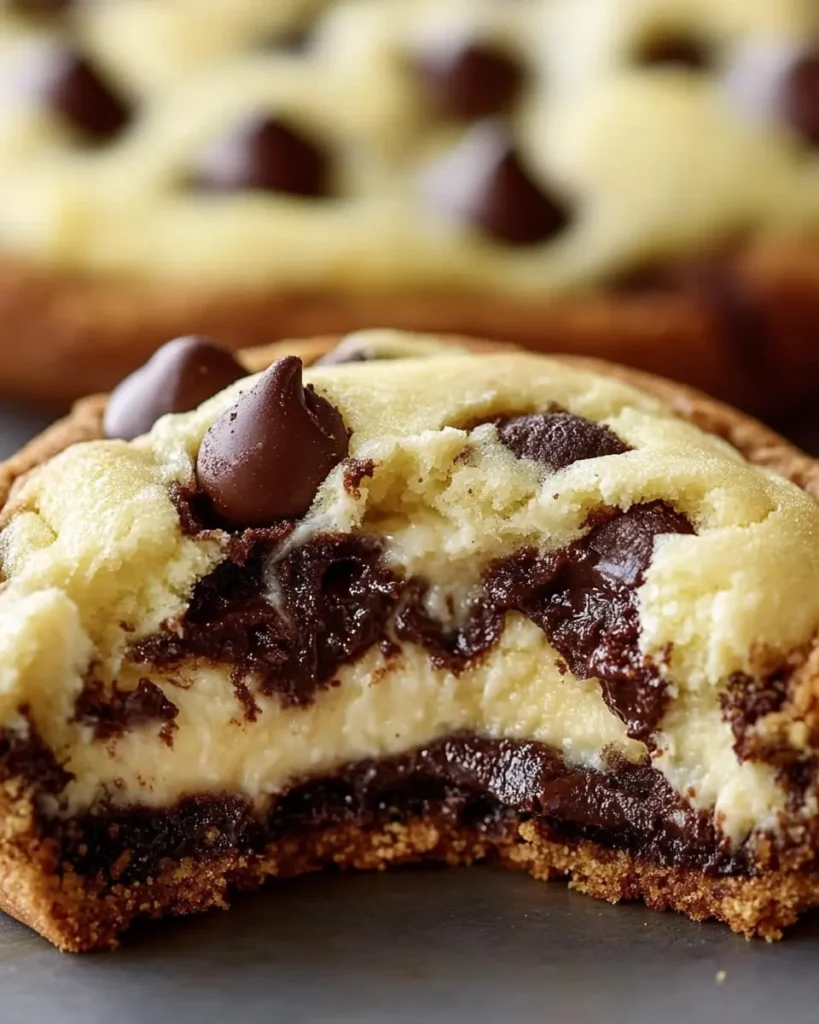
These cookies are nothing short of magical, and here’s why they’ll become your new obsession. First, let’s talk about the incredible textural experience. The outside offers that familiar chocolate chip cookie appeal, with crisp edges that melt into a soft and chewy center. But then comes the surprise: a cool, creamy burst of tangy cheesecake that creates the most delightful contrast imaginable. It’s like finding treasure in every bite.
The flavor profile is equally impressive. The rich, buttery sweetness of the cookie dough, punctuated by melty chocolate chips, perfectly balances the subtle tang and vanilla notes of the cheesecake filling. It’s not overwhelmingly sweet, thanks to the cream cheese’s natural acidity, which means you can actually taste the complexity of each component rather than just sugar.
From a practical standpoint, these cookies are surprisingly manageable to make. While they might look complicated, the process is straightforward and forgiving. The most time-consuming part is simply waiting for the cheesecake balls to freeze, which requires no skill – just patience. The actual assembly is fun and almost therapeutic, like wrapping little presents for your taste buds.
These cookies are incredibly versatile for different occasions. They’re sophisticated enough for dinner parties, fun enough for kids’ celebrations, and special enough for holidays. They transport well, making them perfect for potluck contributions, bake sales, or care packages. You can make them ahead of time, and they actually improve slightly after a day, as the flavors meld together beautifully.
The recipe leaves ample opportunity for customization and personal flair. You can experiment with different types of chocolate chips, add nuts to the cookie dough, or even flavor the cheesecake filling with lemon zest, almond extract, or a touch of espresso powder. The basic technique, once mastered, becomes a canvas for your imagination.
Ingredients for Cheesecake-Filled Chocolate Chip Cookies
For the Cookie Dough:
- 2 cups all-purpose flour (240g) – The foundation of our cookie structure
- 1 teaspoon baking soda – Provides the perfect amount of lift and chewiness
- 1 teaspoon salt – Enhances all the flavors and balances sweetness
- 1 cup (226g) of melted unsalted butter – Adds a rich taste and helps achieve a soft, tender texture.
- 1 cup brown sugar, packed (213g) – Adds moisture and deep caramel notes
- ½ cup granulated sugar (100g) – Contributes to texture and sweetness balance
- 2 large eggs, room temperature – Binds ingredients and adds richness
- 1 teaspoon of vanilla extract – A timeless ingredient that boosts overall flavor.
- 2 cups chocolate chips (340g) – Use semi-sweet or dark chocolate for best results
For the Cheesecake Filling:
- 8 ounces cream cheese, softened (226g) – Must be at room temperature for smooth mixing
- ¼ cup (50g) granulated sugar – Adds a touch of sweetness without being too intense.
- ½ teaspoon vanilla extract – Enhances the cookie’s subtle vanilla flavor.
Optional Substitutions and Notes:
- Flour: You can substitute up to ½ cup with whole wheat flour for a nuttier flavor
- Butter: High-quality European-style butter will make a noticeable difference
- Chocolate chips: Try mini chips for more even distribution, or chunks for bigger chocolate moments
- Cream cheese: Full-fat only – low-fat versions won’t provide the right texture
- Sugar: You can reduce the sugar slightly if you prefer less sweet cookies, but don’t eliminate it entirely as it affects texture
How to Make Cheesecake-Filled Chocolate Chip Cookies – Step by Step
Step 1: Make the Cheesecake Filling (allow 30–45 minutes in advance)
Begin by ensuring your cream cheese is completely softened – this is crucial for a smooth filling. In a medium bowl, combine the 8 ounces of cream cheese, ¼ cup granulated sugar, and ½ teaspoon vanilla extract. Using an electric mixer or vigorous hand mixing, beat the mixture until it’s completely smooth and no lumps remain. This usually takes 2-3 minutes with an electric mixer.
Once smooth, use a small cookie scoop or teaspoon to portion the mixture into small balls, roughly 1 teaspoon each. You should get about 24-30 balls. Place these on a small baking sheet lined with parchment paper and freeze for 30-45 minutes until they’re firm enough to handle without losing their shape. This step is essential – soft filling will be impossible to encase in cookie dough.
Step 2: Prepare the Cookie Dough
While your cheesecake balls are freezing, start on the cookie dough. Set your oven to 350°F (175°C) and prepare two large baking trays by lining them with parchment paper.
In a medium bowl, whisk together the flour, baking soda, and salt until evenly combined. Set this dry mixture aside.
In a large mixing bowl, combine the melted butter (make sure it’s not hot, just warm), brown sugar, and granulated sugar. Whisk thoroughly until the mixture becomes smooth, glossy, and evenly blended. Add the eggs individually, making sure to mix well after each one, then incorporate the vanilla extract.
Gradually add the flour mixture to the wet ingredients, stirring just until everything is combined. Avoid overmixing to prevent the cookies from becoming too firm. Gently fold in the chocolate chips, making sure they are evenly spread throughout the dough.
Step 3: Assemble the Cookies
This is where the transformation occurs, and it’s simpler than you may expect. Take about 2 tablespoons of cookie dough and flatten it in your palm to create a disc roughly 3-4 inches across. Don’t worry about perfect circles – rustic is beautiful here.
Place one frozen cheesecake ball in the center of the flattened dough. Now, gently bring the edges of the dough up and around the cheesecake ball, pinching and pressing to seal completely. Make sure there are no cracks or openings where the filling might leak out during baking. Roll the assembled cookie gently between your palms to create a smooth ball.
Repeat this process with the remaining dough and cheesecake balls. You should end up with about 24 cookies, depending on your portion sizes.
Step 4: Bake to Perfection
Place the assembled cookies on your prepared baking sheets, leaving about 2 inches between each cookie as they will spread during baking. Bake for 12-14 minutes, rotating the pans halfway through for even browning.
The cookies are done when the edges are golden brown but the centers still look slightly underbaked and soft. They’ll continue cooking from residual heat after you remove them from the oven. Overbaking will result in hard cookies and potentially leaked filling.
Step 5: Cool and Serve
Allow the cookies to cool on the baking sheet for 5 minutes before carefully transferring them to a wire rack. This initial cooling period is important as it allows the cookies to set up properly. The cheesecake filling will be very hot initially, so resist the temptation to bite into them immediately.
These cookies are delicious both warm and at room temperature, and many people actually prefer them chilled, as the cheesecake center becomes more prominent when cool.
Tips for Success
Perfect Your Technique: The key to leak-free cookies is ensuring your cheesecake balls are properly frozen and your cookie dough isn’t too warm. If the dough becomes too soft to work with, chill it for 15-30 minutes.
Size Matters: Keep your cheesecake balls small – about 1 teaspoon each. Larger balls are harder to encase completely and more likely to leak during baking. Similarly, don’t make your cookies too large, as they become difficult to handle and may not bake evenly.
Sealing Secrets: When wrapping the dough around the filling, make sure to pinch all seams tightly and smooth over any cracks. Think of it like making dumplings – you want a complete seal with no weak points.
Temperature Control: Room temperature ingredients mix more easily and create better texture. Take your eggs and cream cheese out of the refrigerator about an hour before baking. If you’re in a hurry, you can quickly soften cream cheese in the microwave using 15-second intervals.
Storage Solutions: Store cooled cookies in an airtight container in the refrigerator for up to one week. You can also freeze them for up to three months. When freezing, be sure to place parchment paper between layers to avoid sticking.
Prep Ahead: Assemble the cookies fully and freeze them unbaked. When ready to bake, cook them straight from the freezer, adding an additional 2-3 minutes to the baking time. This makes them perfect for entertaining – just pop them in the oven when guests arrive.
Troubleshooting: If your cookies spread too much, your dough might be too warm or you might need a bit more flour. If they don’t spread enough, ensure your butter was properly melted and cooled slightly before mixing.
FAQ for Cheesecake-Filled Chocolate Chip Cookies
Can I make this recipe ahead of time? Absolutely! These cookies are actually excellent make-ahead treats. You can prepare the cheesecake filling up to 3 days in advance and keep it refrigerated. The unbaked cookies can be frozen for up to 3 months simply bake them from frozen, adding a few extra minutes to the cooking time. Once baked, the cookies will stay fresh in the refrigerator for up to a week and can also be frozen for up to 3 months.
Can I substitute ingredients for dietary restrictions? For gluten-free versions, substitute the all-purpose flour with a 1:1 gluten-free flour blend that contains xanthan gum. The texture may vary a bit, but it will still be delicious. For dairy-free options, you can use vegan cream cheese and plant-based butter, though the texture and flavor will vary from the original. Unfortunately, these cookies don’t adapt well to sugar-free substitutions as the sugar contributes significantly to the texture.
What’s the best way to store leftovers? Store cooled cookies in an airtight container in the refrigerator for optimal freshness. The cheesecake filling needs to be kept cool, so room temperature storage isn’t recommended for more than a day. For longer storage, wrap individual cookies in plastic wrap and freeze them.
Can I freeze the dish? Yes! Both baked and unbaked cookies freeze excellently. For unbaked cookies, freeze them on a baking sheet first, then transfer to freezer bags once solid. Baked cookies should be completely cooled before freezing and can be individually wrapped for easy serving. Frozen baked cookies are actually delicious eaten semi-frozen – the cheesecake center has an almost ice cream-like quality.
What can I do to stop the filling from spilling out? The most common cause of leaking is inadequately sealed dough or cheesecake balls that aren’t frozen solid. Make sure your cheesecake mixture is firm before assembly, seal all edges completely, and don’t make the cookies too large. If you notice small leaks during baking, don’t worry – they often seal themselves as the cookie bakes and still taste amazing.
Conclusion
Cheesecake-Filled Chocolate Chip Cookies represent the perfect marriage of comfort and sophistication, combining beloved classic flavors in an innovative format that’s sure to impress everyone who tries them. Whether you’re baking for a special occasion or simply want to elevate your everyday cookie game, this recipe delivers both visual wow-factor and incredible taste.
The beauty of this recipe lies not just in its delicious results, but in its adaptability and the joy of the baking process itself. There’s something deeply satisfying about creating these little packages of happiness, knowing that each one contains a delightful surprise waiting to be discovered.
Don’t be afraid to make this recipe your own. Experiment with different flavor combinations, try various chocolate types, or adjust the sweetness to match your preferences. Share your creations with friends and family, and don’t forget to document your baking adventures – these cookies are definitely Instagram-worthy!
We’d love to hear about your experience making these cookies. Did you try any creative variations? How did your family and friends react to the surprise centers? Share your photos and modifications in the comments below, and inspire other bakers to try this delightful fusion dessert.
Remember, the best recipes are the ones that bring people together and create lasting memories. These Cheesecake-Filled Chocolate Chip Cookies are guaranteed to do just that – one incredible bite at a time. Happy baking!