
Introduction to Giant Chocolate Chip Cookie Pizza
There’s something magical about the moment when two beloved classics collide to create something even more extraordinary. The Giant Chocolate Chip Cookie Pizza is precisely that kind of culinary magic Think of the cookie pizza as your dessert canvas. a delightful marriage between America’s favorite cookie and the shareable, celebratory nature of pizza. This dessert superstar has been making waves at birthday parties, potlucks, and special gatherings since the early 1990s when mall cookie shops began experimenting with larger-format cookie creations.
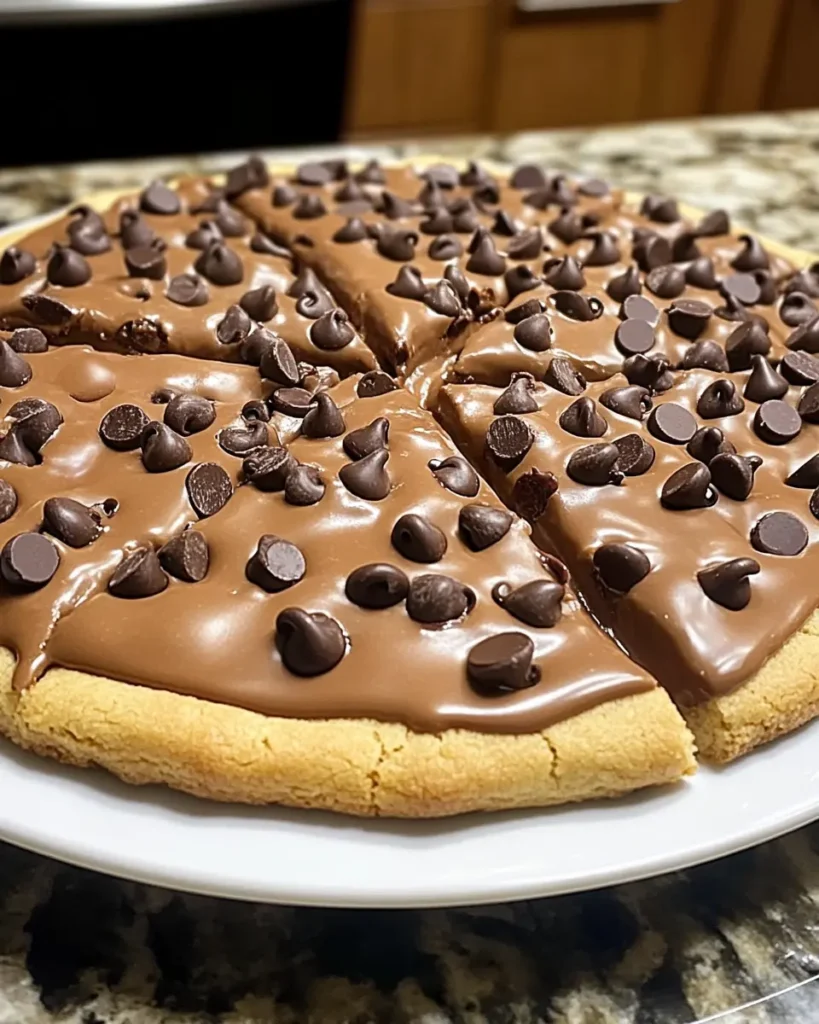
The concept is brilliantly simple yet utterly genius: take everything we love about chocolate chip cookies. Imagine the sharp, golden-brown edges, the soft and chewy middle, and pockets of gooey, melted chocolate now scale that up to the size and indulgence of a full pizza. Then, elevate it further with a luscious cream cheese frosting and an array of fun toppings that transform it into a customizable dessert canvas. Unlike traditional cookies that might be enjoyed individually, the cookie pizza creates a shared experience, bringing people together as they slice into its magnificent form.
What makes this particular recipe special is the perfect balance it strikes between structure and texture. The cookie base is sturdy enough to hold its shape when sliced (like a good pizza should) yet maintains that ideal cookie texture with slightly crisp edges and a tender, chewy center. The addition of an extra egg yolk creates richness and chewiness that sets this recipe apart from standard cookie formulations. And the cream cheese frosting adds a tangy counterpoint to the sweet cookie base that elevates the entire dessert beyond the ordinary.
Why You’ll Love This Giant Chocolate Chip Cookie Pizza
There are countless reasons to fall head over heels for this magnificent dessert creation, but here are some of the most compelling:
Irresistible Flavor and Texture Combination
The cookie base delivers everything you love about traditional chocolate chip cookies but in a more dramatic format. The edges develop a satisfying golden crispness while the center maintains that perfect chewy texture we all crave. The semi-sweet chocolate chips create pockets of melty goodness throughout, and the cream cheese frosting adds a subtle tanginess that perfectly balances the sweetness of the cookie. With each bite, you’ll experience the harmonious interplay of textures and flavors that make this dessert truly special.
Impressive Visual Appeal with Minimal Effort
Despite its show-stopping appearance, this cookie pizza is surprisingly straightforward to make. There’s no need for multiple batches of cookies or complex decorating skills. Simply press the dough into a pan, bake, cool, and top. The result looks like something from a professional bakery, but requires only basic baking skills. The circular format naturally creates a visually appealing presentation that wows guests before they even take their first bite.
Infinitely Customizable
Picture the cookie pizza as a blank slate for your sweetest creations. While the recipe provides a perfect starting point with cream cheese frosting and suggested toppings, you can easily adapt it to suit different occasions, preferences, or themes:
- Create holiday variations with seasonal colors (red and green M&Ms for Christmas, pastels for Easter)
- Design birthday cookie pizzas with the recipient’s favorite candies and sprinkles
- Make team-spirit versions using colored candies that match school or sports team colors
- Create flavor variations by swapping chocolate chips for peanut butter chips, butterscotch chips, or a mixed variety
Perfect for Any Occasion
Unlike some desserts that seem reserved for specific celebrations, the cookie pizza is appropriate for virtually any gathering:
- Birthday celebrations (a fun alternative to traditional cake)
- Game day watch parties
- Potluck gatherings
- Family dessert nights
- Holiday celebrations
- After-school treats for hungry kids
- Office parties and celebrations
Make-Ahead Friendly
The components can be prepared in advance, making this a stress-free option for entertaining. The cookie base can be baked a day ahead and stored properly, then frosted and decorated shortly before serving. This flexibility makes it perfect for busy hosts who want to impress without last-minute kitchen stress.
Easier to Serve Than Traditional Cookies
The pizza format eliminates the need to portion individual cookies. Simply slice and serve, much like you would a traditional pizza. This makes serving a breeze, especially for larger gatherings. Plus, guests can choose their ideal slice size based on their appetite.
Ingredients for Giant Chocolate Chip Cookie Pizza
For the Cookie Crust:
- 2¼ cups (280g) all-purpose flour
- 1 teaspoon baking soda
- ½ teaspoon salt
- 170 grams (¾ cup) of unsalted butter, softened at room temperature
- 150 grams (¾ cup) of packed brown sugar either light or dark is suitable
- ½ cup (100g) granulated sugar
- 1 large egg, at room temperature
- 1 egg yolk, at room temperature
- 2 teaspoons pure vanilla extract
- 1½ cups (255g) semi-sweet chocolate chips
For the Cream Cheese Frosting:
- 115 grams (4 ounces) of cream cheese, brought to room temperature for easy mixing
- 2 tablespoons (30g) unsalted butter, softened to room temperature
- 1 cup (120g) powdered sugar, sifted to remove lumps
- 1 teaspoon pure vanilla extract
- 1-2 tablespoons milk (whole milk preferred, but any will work)
Optional Toppings (Mix and Match According to Preference):
- Mini M&Ms (approximately ½ cup)
- Rainbow sprinkles (approximately ¼ cup)
- Chopped nuts (walnuts, pecans, or peanuts work well; approximately ⅓ cup)
- Additional chocolate chips (mini chips work particularly well for topping; approximately ⅓ cup)
- Chocolate candies like Reese’s Pieces or chopped peanut butter cups
- Toffee bits
- Mini marshmallows
- Shredded coconut
Notes on Ingredients:
- Butter: Ensure it’s truly softened but not melted for the proper cookie texture. Leave it out at room temperature for about 1 hour before beginning.
- Sugars: The combination of brown and white sugars is crucial for the proper texture and flavor. Brown sugar adds moisture and chewiness, while granulated sugar helps create crisp edges.
- Eggs: Room temperature eggs incorporate more evenly into the batter. To quickly bring cold eggs to room temperature, place them in a bowl of warm (not hot) water for 5-10 minutes.
- Chocolate Chips: Semi-sweet provides the perfect balance, but you can substitute milk chocolate for a sweeter cookie or dark chocolate for a more intense flavor.
- Cream Cheese: Full-fat cream cheese yields the best flavor and texture for the frosting, but reduced-fat (not fat-free) can work in a pinch.
Step-by-Step Guide to Making a Giant Chocolate Chip Cookie Pizza

Step 1: Prepare Your Equipment and Ingredients
- Preheat your oven to 350°F (175°C).
- Prepare a 12-inch pizza pan by greasing it thoroughly or lining with parchment paper. If using parchment, trace the bottom of the pan on the paper, cut it out, and place it inside the pan. This will make removal much easier after baking.
- Set out all ingredients to ensure they’re at the proper temperature, especially the butter, eggs, and cream cheese.
Step 2: Mix the Dry Ingredients
- In a medium bowl, whisk together the all-purpose flour, baking soda, and salt until well combined.
- Whisking the dry ingredients separately ensures they’ll be evenly distributed throughout the cookie dough, preventing pockets of salt or baking soda.
Step 3: Cream the Butter and Sugars
- In a large mixing bowl using an electric mixer (stand mixer or handheld), beat the softened butter on medium speed until smooth and creamy, about 1 minute.
- Mix the brown sugar and white sugar into the butter.
- Increase the speed to medium-high and beat for 2-3 minutes until the mixture becomes light and fluffy with a slightly lighter color. This process, called creaming, incorporates air into the mixture and is crucial for a good cookie texture.
- Use a rubber spatula to occasionally scrape the sides of the bowl, making sure all ingredients are blended evenly.
Step 4: Add the Wet Ingredients
- Add the whole egg to the butter-sugar mixture and beat until completely incorporated.
- Add the additional egg yolk and beat until combined. Adding an extra egg yolk enhances the richness and helps create a chewier consistency.
- Pour in the vanilla extract and mix until blended.
- Scrape down the sides and bottom of the bowl again to ensure everything is evenly mixed.
Step 5: Combine Wet and Dry Ingredients
- Slowly incorporate the dry ingredients into the wet mixture in two to three parts, mixing on low speed after each addition until no traces of flour remain.
- Be careful not to overmix at this stage; overmixing develops gluten that can make your cookie tough rather than tender. Mix just until no flour streaks remain.
Step 6: Fold in the Chocolate Chips
- Carefully fold the chocolate chips into the dough with a rubber spatula, ensuring they’re evenly spread throughout.
- If the dough seems too sticky to handle at this point, you can refrigerate it for 15-20 minutes to firm it up slightly.
Step 7: Form and Bake the Cookie Pizza
- Transfer the dough to your prepared pizza pan.
- Using lightly floured fingers or the back of a measuring cup, gently press and spread the dough evenly to the edges of the pan. Create a slightly raised edge (about ½ inch) around the perimeter to contain the frosting later.
- For an extra-neat edge, you can use the back of a spoon to create a slight indentation around the perimeter, defining the “crust” of your cookie pizza.
- Transfer the pan to the preheated oven and bake for 18-22 minutes. The exact baking time may vary depending on your oven and how soft you like the center.
- The cookie pizza is done when the edges are golden brown but the center still looks slightly underdone (it will continue cooking from residual heat after removal from the oven).
Step 8: Cool Completely
- Place the pan on a wire cooling rack and allow the cookie pizza to cool completely in the pan, about 1-2 hours.
- Patience is key here! Attempting to frost a warm cookie will cause the frosting to melt and run.
Step 9: Prepare the Cream Cheese Frosting
- In a medium bowl, combine the softened cream cheese and butter. Beat with an electric mixer on medium speed until smooth and no lumps remain, about 2 minutes.
- Gradually add the sifted powdered sugar, mixing on low speed initially to prevent a sugar cloud, then increasing to medium speed once incorporated.
- Add the vanilla extract and mix to combine.
- Gradually add milk, one tablespoon at a time, mixing after each addition until the frosting reaches your preferred spreading consistency. It should be smooth and easy to spread, without being too runny.
Step 10: Frost and Decorate
- Once the cookie pizza is completely cooled, carefully remove it from the pan. If you used parchment paper, slide it onto a serving platter or cake stand.
- Using an offset spatula or the back of a spoon, spread the cream cheese frosting evenly over the top of the cookie, leaving the raised edge visible for that classic “pizza crust” look.
- While the frosting is still soft, scatter your chosen toppings over the surface. You can cover the entire pizza or create sections with different toppings.
- For a more artistic presentation, try arranging toppings in concentric circles or creating a pattern.
Step 11: Slice and Serve
- For the cleanest cuts, refrigerate the decorated cookie pizza for about 30 minutes before slicing.
- Use a sharp knife or pizza cutter to slice into wedges, wiping the blade clean between cuts.
- Serve immediately or store covered at room temperature if serving within 8 hours. For longer storage, refrigerate due to the cream cheese frosting.
Tips for Success
Perfect Cookie Base
- Measure flour correctly: Either weigh it for the most accuracy or use the spoon-and-level method (spoon flour into measuring cup and level off with a knife) rather than scooping directly with the measuring cup, which can pack in too much flour.
- Don’t skip the creaming step: Properly creaming the butter and sugars incorporates air into the dough, which helps create the right texture in the finished cookie.
- The visual doneness test: The cookie should look slightly underdone in the center when you remove it from the oven. It will continue cooking from residual heat and firm up as it cools, giving you that perfect chewy center.
- Pan alternatives: If you don’t have a pizza pan, you can use a similarly sized round cake pan or even form a freehand circle on a regular baking sheet.
Frosting Finesse
- Temperature is key: Ensure the cream cheese and butter are fully softened to achieve a smooth, lump-free frosting. If you’re in a hurry, cut them into small cubes to speed up the softening process.
- Sift the powdered sugar: This extra step prevents lumps in your frosting and is worth the minimal effort.
- Frosting consistency: If your frosting becomes too thin, add more powdered sugar a tablespoon at a time. If it’s too thick, add tiny amounts of milk until you reach the desired consistency.
- Creative color: Add a few drops of food coloring to the frosting for themed occasions—pink for Valentine’s Day, green for St. Patrick’s Day, team colors for sports events, etc.
Decoration Strategies
- Sectioned toppings: Divide the pizza into sections (like a traditional pizza) and use different toppings in each section to please various preferences.
- Press gently: When adding toppings, press them slightly into the frosting so they adhere better and don’t fall off when slicing.
- Think seasonally: Use seasonal colored candies and sprinkles to match holidays and occasions throughout the year.
- Written messages: Use small candies like mini M&Ms to write short messages for birthdays or celebrations.
Make-Ahead and Storage
- Dough preparation: The cookie dough can be made up to 24 hours in advance and refrigerated. Let it come to near room temperature before pressing into the pan.
- Component storage: If making components ahead, store the baked cookie (wrapped tightly) at room temperature for up to 2 days, and refrigerate the frosting separately. Let the frosting sit at room temperature before spreading it.
- Cutting strategy: For the cleanest slices, refrigerate the assembled cookie pizza for 30 minutes before cutting with a sharp knife (wiped clean between cuts).
- Leftovers: Store any leftover cookie pizza in the refrigerator due to the cream cheese frosting. Allow slices to come to room temperature for about 15 minutes before serving for the best flavor and texture.
Troubleshooting Common Issues
- Cookie spreading too much: If your dough seems very soft or if you live in a hot climate, chill the shaped dough in the pizza pan for 15-20 minutes before baking.
- Uneven baking: Rotate the pan halfway through baking if your oven has hot spots.
- Too much browning: If the edges are browning too quickly, loosely cover them with strips of aluminum foil for the remainder of the baking time.
- Sticking to the pan: If you’re concerned about sticking, use both greasing and parchment paper for extra insurance.
FAQ for Giant Chocolate Chip Cookie Pizza
Can I make this recipe ahead of time?
Absolutely! You have several make-ahead options:
- Option 1: Make the dough up to three days ahead and keep it covered in the refrigerator. Let it sit at room temperature for about 30 minutes before pressing into the pan.
- Option 2: Bake the cookie base up to 2 days ahead, cool completely, wrap tightly, and store at room temperature. Frost and decorate before serving.
- Option 3: Prepare the frosting up to 3 days ahead and refrigerate in an airtight container. Let it come to room temperature and re-whip briefly before spreading.
- Option 4: Assemble the entire cookie pizza (including frosting and decorations) up to 8 hours before serving and store in the refrigerator. Allow it to rest at room temperature for 15-30 minutes before serving.
Can I substitute ingredients in this recipe?
Yes, this recipe is quite adaptable:
- Butter: Salted butter can be used instead of unsalted; just reduce the added salt to ¼ teaspoon.
- Sugars: You can use all brown sugar for a more caramel-like flavor and chewier texture, or all granulated sugar for a crisper cookie.
- Chocolate chips: Any chip variety works well—milk chocolate, dark chocolate, white chocolate, or even flavored chips like butterscotch or peanut butter.
- Cream cheese frosting alternatives: If you prefer, you can substitute buttercream frosting, chocolate ganache, or even a simple glaze.
- Gluten-free option: A 1:1 gluten-free flour blend can typically be substituted for the all-purpose flour with good results.
What’s the best way to store leftovers?
Due to the cream cheese frosting, leftovers should be stored in the refrigerator:
- Place leftover slices in an airtight container, separating layers with parchment paper if stacking.
- Refrigerate for up to 5 days.
- For the best taste and texture, let refrigerated slices stand at room temperature for about 15 minutes before serving.
Can I freeze this cookie pizza?
Yes, with some considerations:
- Unfrosted cookie base: Wrap well in plastic wrap and then aluminum foil. Freeze for up to 3 months. Thaw overnight in the refrigerator or for a few hours at room temperature before frosting and decorating.
- Fully assembled cookie pizza: Freezing is possible but not ideal, as the texture of the frosting may change slightly upon thawing. If you do freeze the assembled cookie pizza, place it in the freezer until solid, then wrap tightly. Freeze for up to 1 month. Thaw overnight in the refrigerator.
- Individual slices: These freeze beautifully and make for great portion control. Wrap individual slices well and freeze for up to 2 months.
How can I make this recipe dairy-free or vegan?
With some substitutions, this recipe can be adapted for dietary restrictions:
Dairy-Free Version:
- Replace butter with a plant-based butter substitute (like Earth Balance buttery sticks)
- Substitute the chocolate chips with dairy-free chocolate chips
- For the frosting, use dairy-free cream cheese and plant-based butter alternatives
Vegan Version:
- Make the dairy-free substitutions listed above
- Replace the egg and egg yolk with one of these options:
- ¼ cup unsweetened applesauce plus ¼ teaspoon baking powder
- 2 tablespoons ground flaxseed mixed with 5 tablespoons water (let sit for 5 minutes before using)
- Ensure your toppings are vegan (many sprinkles and some candies contain animal-derived ingredients)
Can I make smaller individual cookie pizzas instead of one large one?
Absolutely! This recipe adapts beautifully to smaller formats:
- Divide the dough into 4-6 portions for individual cookie pizzas
- Press each portion into a 4-6 inch circle on a parchment-lined baking sheet
- Reduce the baking time to 10-14 minutes, depending on size
- Cool and decorate as directed
Why is my cookie pizza too hard/soft in the center?
Cookie texture can be affected by several factors:
- Too hard: The cookie was likely overbaked. Remember that it will continue to firm up as it cools, so it should look slightly underdone in the center when you remove it from the oven.
- Too soft: Either the cookie was underbaked, or there may have been too much butter or sugar in the dough. Make sure to measure ingredients accurately and bake until the edges are golden brown.
- Oven temperature variations: Many ovens run hotter or cooler than the set temperature. An oven thermometer can help you adjust accordingly.
Is it possible to incorporate different flavors into the cookie base?
Definitely! Here are some delicious variations:
- Add ½ teaspoon of cinnamon or other spices
- Substitute ½ teaspoon of the vanilla extract with almond extract.
- Stir in ⅓ cup of toffee bits along with the chocolate chips.
- Substitute ⅓ cup of the chocolate chips with dried fruit like cranberries or cherries
- Add the zest of one orange or lemon for a citrusy twist
- Include ¼ cup of sprinkles in the dough for a funfetti cookie pizza
Conclusion
The Giant Chocolate Chip Cookie Pizza represents everything we love about home baking, it’s fun, adaptable, impressive, and absolutely delicious. It transforms the humble chocolate chip cookie into a celebration-worthy dessert that brings people together through the simple joy of sharing something sweet. The combination of a perfectly textured cookie base, tangy cream cheese frosting, and customizable toppings creates an experience that satisfies both visually and gastronomically.
The beauty of this recipe lies in its versatility. You can make it as basic or as intricate as you like, fitting any occasion from casual to elegant. Children delight in helping to decorate the surface, making it a wonderful family baking project. Adults appreciate the nostalgic flavors elevated to a more sophisticated presentation. And everyone loves slicing into that first piece, revealing the layers of cookie, frosting, and colorful toppings.
As you embark on making your own Giant Chocolate Chip Cookie Pizza, don’t be afraid to experiment and make it your own. Maybe you’ll discover a new favorite topping combination or develop a signature decorating style that becomes your trademark at gatherings. The possibilities are as endless as your imagination.
We’d love to hear how your cookie pizza turns out! Share your creations, variations, and the occasions you’ve made them for in the comments below. Did you try any unique topping combinations? Did you make it for a special celebration? Your experiences and creative adaptations might just inspire other bakers in our community.
Now, preheat that oven and get ready to create a dessert that’s sure to become a requested favorite for years to come!
Hi, this is a comment.
To get started with moderating, editing, and deleting comments, please visit the Comments screen in the dashboard.
Commenter avatars come from Gravatar.